Humble Fail: Is tech DIY worth it?

What happened?

I run a splash site to easily link to all my profile sites (think LinkTree but I own it). The site is built on Astro and uses tailwindcss and Astro Icon.

I was in the process of adding new profile links for D&D Beyond and Roll20. I could run the development server locally and everything worked, but the public site wasn’t updating. I go to check my GitHub Actions logs and find this message:

Node.js 16 actions are deprecated. Please update the following actions to use Node.js 20: actions/checkout@v3, actions/setup-node@v3. For more information see: https://github.blog/changelog/2023-09-22-github-actions-transitioning-from-node-16-to-node-20/.

I follow the link and read on, the change is as simple as changing my workflow to use v4 and specifying Node.js 20. I push the change, only to find that it broke again. This time it was the astro-icon module. I was running v0.8.1 so I upgraded to v1.1.0 (following instructions), but it kept failing. I spent hours searching for a fix, and finally was going to file a bug report on astro-icon, when I came across their issue template that reads:

✅ I am using the latest version of Astro Icon.
✅ Astro Icon has been added to my astro.config.mjs file as an integration.
✅ I have installed the corresponding @iconify-json/* packages.
✅ I am using the latest version of Astro and all plugins.
✅ I am using a version of Node that Astro supports (>=18.14.1)

Source: https://github.com/natemoo-re/astro-icon/blob/main/.github/ISSUE_TEMPLATE/bug.yml

I’m typically quick to dismiss these, but my days in support meant that I had to run through each of them. I get down to “the latest version of Astro”. I’m running v2.9.7–which sounds like the latest version. Out of curiosity, what’s the latest version?

v4.3.2 🤬

Sure enough, upgrading fixed it.

What did you learn?

There were a few takeaways from my Saturday morning shenanigans:

  1. “Build over buy” still has consequences. I didn’t want to pay Linktree’s subscription, thinking I could maintain the site cheaper. I still think that’s a good choice, but had I used LinkTree then I wouldn’t have lost this Saturday morning. I also chose to build my own because of the level of customizations I wanted/plan to add. I chose “build over buy”, and got burned 🔥 (a little).
  2. “Sharpening the saw” only works if you keep up with it. I chose Astro after seeing someone else’s site built that way (sorry don’t remember who) and I liked the simple use of tags to convey intent, then putting the design of it (which is repeated many times) into a separate file. I don’t use Astro for anything else, and that directly contributed to how long I spent on the issue. I feel that I would have solved this almost immediately had I spent more than 20 minutes every 6 months using Astro.
  3. Corporations go through this on a much larger scale. My problem is IDENTICAL to major corporations who invest in agile development, then ignore the practices. If I spent more time working on this splash site, I would’ve kept it updated and would have built up the experience to know to check for the latest version. When I didn’t–I spent a lot of time trying to figure out why.
  4. Good community hygiene works. I now avoided filing an issue on a project because of Astro Icon’s issue template. I don’t see good issue templates often, but this one was concise and direct…and showed me the problem.

Ultimately, this problem got me thinking about whether DIY in tech is worth it. I don’t think I considered troubleshooting time when I decided to “build”, but I still like the end result and will continue to build my splash site. I’ve also gone back on this blog between Hugo and WordPress (and different vendors). The key is knowing and understanding the tradeoffs, then being able to move when the need arises.

Bootstrapping pi-bernetes: including the wheels

In a previous post, I shared my journey through creating a repeatable build of my homelab cluster using ansible. I can now rebuild Kubernetes anytime I need/want to, but what should I do with it?

Finding my problem while eating humble pie

One idea is to have a locally-hosted all-in-one git service like Gitea. In previous builds, I started installing gitea using a helm chart. I could then forward the port to my local workstation and I had git!

However, I’m not always at that workstation and need to access gitea without necessarily using kubectl, so I opted to create a Load Balancer. K3s does include ServiceLB, but it lacks features and didn’t work out of the box on my network. MetalLB has the support and community, so I went and grabbed that helm chart and installed it. Presto! Now I can support load balancers.

Then, I had to restart a pod–and lost my gitea installation. I didn’t enable persistent storage on my gitea deployment. Well to do that, I need to check the CSI drivers. There’s the default local-path, but that doesn’t allow my pods to move. Since Rancher makes both K3s and Longhorn, I fetched the longhorn helm chart and had persistent storage.

Then I needed to customize Traefik (installed by default) and broke it…

…and wanted to monitor everything, so put prometheus on, and broke it again…

..and there came a point where I questioned whether I was really experienced at Kubernetes at all!1

My problem wasn’t experience or knowledge based, but rather how I had chosen to operate. Every time I rebuilt the cluster, I would say to myself “I should probably automate this–I’ll do it after I build it”…and never go back to it.

I realized that most of my IT career had been spent watching customers and clients install a package to a linux server, or build a new S3 bucket in the AWS console, or apply a schema patch to a database…

…and I had just done the same thing!

My proposed solution had always been the same: just automate it. So I did.

Now, I can completely wipe off k3s from the SBDs, and in one command get it running again.

Attaching the wheels to the frame

With a Kubernetes cluster, I have a frame(work) that I can put widgets on. Like a car can’t go anywhere without wheels (still waiting for my flying car, thanks Back to the Future Part II), my Kubernetes cluster needs some support before I can use it for my true goals. I need MetalLB, a CSI, a customized traefik, etc.

One reason I picked ansible for building the cluster was that I could use it to both deploy the cluster AND the Kubernetes resources. I also considered OpenTofu (not Terraform–here’s why) and had a few other suggestions (which I haven’t really looked at yet). I may go that direction in the future, but borrowing the leadership principle Bias for Action, I picked one and can always change it later.

Bias for Action
Speed matters in business. Many decisions and actions are reversible and do not need extensive study. We value calculated risk taking.

-Amazon Leadership Principles

I started with a basic playbook template to make sure I could query Kubernetes by listing the namespaces in the cluster.

---
- name: Kubernetes Components
  hosts: kubernetes
  gather_facts: false
  tasks:
    - kubernetes.core.k8s_info:
        context: k3s-ansible
        kind: Namespace
      register: ns
    - ansible.builtin.debug:
        var: ns.resources | map(attribute='metadata.name') | list

I have this host entry in my inventory.yaml file as well. This lets me specify kubernetes as the host above.

kubernetes:
  hosts:
    k8s-azeroth:
  vars:
    ansible_connection: local
    ansible_python_interpreter: "{{ansible_playbook_python}}"

As a quick test, I get this output.

PLAY [Kubernetes Components] ******************************************************************************

TASK [kubernetes.core.k8s_info] ***************************************************************************
ok: [k8s-azeroth]

TASK [ansible.builtin.debug] **#***************************************************************************
ok: [k8s-azeroth] => {
    "ns.resources | map(attribute='metadata.name') | list": [
        "kube-system",
        "kube-public",
        "kube-node-lease",
        "default"
    ]
}

PLAY RECAP ************************************************************************************************
k8s-azeroth        : ok=2    changed=0    unreachable=0    failed=0    skipped=0    rescued=0    ignored=0   

I now have an easy mechanism to call the kubernetes API from within my same ansible structure!

Adding the first component – MetalLB

After looking at the MetalLB installation guide, it also supports kustomize, so I tried to setup kustomize through ansible. The task is still kubernetes.core.k8s, but there’s a lookup module specifically for kustomize). The task looks like this:

    - name: Network - MetalLB
      kubernetes.core.k8s:
        state: present
        namespace2: metallb-system
        definition: "{{ lookup('kubernetes.core.kustomize', dir='github.com/metallb/metallb/config/native?ref=v0.13.12' ) }}"
      tags: network

It took some investigation, but the task above is the equivalent of this kubectl command:

kubectl create -n metallb-system -k github.com/metallb/metallb/config/native?ref=v0.13.12

Each task supports tags, which I can use later to only install a certain type of component. In this case, I could limit the tasks to the network tag. While it’s not necessary now, it becomes useful very fast.

MetalLB also takes a little extra configuration, which is provided in the form of CustomResources. In my homelab, I have carved out a specific IP range for the load balancer, and I assign it to this cluster with this task:

    - name: Network - LoadBalancer IP addresses
      kubernetes.core.k8s:
        state: present
        src: ../manifests/metallb/ipaddresspool.yaml
      tags: network

For reference, ipaddresspool.yaml contains:

---
apiVersion: metallb.io/v1beta1
kind: IPAddressPool
metadata:
  name: default
  namespace: metallb-system
spec:
  addresses:
  - 10.20.40.10-10.20.40.99
---
apiVersion: metallb.io/v1beta1
kind: L2Advertisement
metadata:
  name: default
  namespace: metallb-system

Alternatively, I can use the full power of the kubernetes.core.k8s module to rearrange and pull files or definitions as necessary. For example, I could combine both files into two ansible tasks, placing the resource definition verbatim under the definition: property.

    - name: IPAddressPool
      kubernetes.core.k8s:
        state: present
        definition:
          apiVersion: metallb.io/v1beta1
          kind: IPAddressPool
          metadata:
            name: default
            namespace: metallb-system
          spec:
            addresses:
            - 10.20.40.10-10.20.40.99
      tags: network
    - name: L2Advertisement
      kubernetes.core.k8s:
        state: present
        definition:
          apiVersion: metallb.io/v1beta1
          kind: L2Advertisement
          metadata:
            name: default
            namespace: metallb-system
      tags: network

This is the flexibility I was looking for, and I’m using the same tool for everything thus far!

Foreward

I’m documenting my complete stack (“eventually”), but I can use this pattern to add different tasks and plays in the same way I’d manage helm charts, resource definitions, or kustomizations. I’d like to try the same setup with terraform or other tools (or to read someone else’s blog about it!), but first I have more components to install before I can put Gitea on my cluster!

  1. Imposter syndrome is real! After all these years, I still feel like an imposter, even if I’ve talked about a topic a hundred times before. You don’t have to know it all–but share what you do know and help someone else learn! ↩︎
  2. Ansible additionally creates the namespace if it does not exist, since it would be required for the state to succeed. ↩︎

Rebuilding pi-bernetes over and over again

While I use my homelab cluster for internal hosting and testing, I also spend significant time fixing and rebuilding it. Since I first posted about building the cluster, I’ve had to stop and rebuild it about 4-5 times. I’ve made various improvements over time and kept them documented in git, but at some point I don’t have a repeatable build for the homelab cluster.

At the same time, my new job has led me to dust off ansible as an operational tool. I’ve used it in the past (and even ran meetups on it), but I hadn’t actually written any playbooks in years. This seemed like a good time to solve both problems at once!

Reacquainting with ansible & building the playbook

I remembered the syntax and logic of ansible, but there were a few changes since I last used ansible. Fortunately, one of those changes included a vscode extension for both ansible and a linter! Most of my past playbooks were for F5 and other network devices. Instead of trying to find a device, I just started to build my inventory using the existing pi cluster and gather facts about the hosts.

I found the official k3s-ansible playbook but didn’t want to start off using it. Ansible does a good job of abstracting away the mechanics and leaves the end user able to declare their intent–but that’s not great for learning. I decided to start from scratch (for now) and create my own playbook based on my current installation with k3sup1. Based on my many installations to this same group of hardware, my current installation script looks like:

k3sup install --host azeroth.local \
  --user pi \
  --ssh-key ~/.ssh/pi_cluster \
  --context azeroth \
--cluster \
--local-path ~/.kube/config \
--merge \
--k3s-extra-args '--flannel-backend=wireguard-native --disable=servicelb --disable=traefik' \
--k3s-version=v1.28.2+k3s1
for host (brokenisles eastking kalimdor northrend pandaria)
  do k3sup join --host ${host}.local --server-host 10.20.40.100 --user pi --ssh-key ~/.ssh/pi_cluster --k3s-version=v1.28.2+k3s1
done

With ansible, you need both a playbook (which has plays and tasks) as well as an inventory file. To keep it simple, I wanted an inventory where I just list the hosts and ansible determines who has the control plane role. (Yes, my theme this time is World of Warcraft worlds/continents–Lok’tar ogar!).

[k3s]
azeroth
eastking
kalimdor
brokenisles
northrend
pandaria

For the playbook, I used the same strategy and just moved the arguments into a new playbook where I ran the commands based on which host.

- name: K3S control plane
  hosts: k3s[0]
  tasks:
    - name: Install K3S
      ansible.builtin.command:
        argv:
          - k3sup
          - install
          - --host={{ ansible_facts['hostname'] }}.local
          - --user
          - pi
          - --ssh-key
          - ~/.ssh/pi_cluster
          - --context
          - azeroth
          - --cluster
          - --local-path
          - ~/.kube/config
          - --merge
          - --k3s-extra-args
          - '--flannel-backend=wireguard-native --disable=servicelb --disable=traefik'
          - --k3s-version=v1.28.2+k3s1
      delegate_to: localhost
    - name: Record control plane IP
      ansible.builtin.set_fact:
        server_host: "{{ ansible_facts['default_ipv4']['address'] }}"
- name: K3S worker plane
  hosts: k3s[1:]
  tasks:
    - name: Host and IP (debug)
      ansible.builtin.debug:
        msg: "{{ ansible_facts['hostname'] }}: {{ ansible_facts['default_ipv4']['address'] }}"
    - name: Install K3S
      ansible.builtin.command:
        argv:
          - k3sup
          - join
          - --host={{ ansible_facts['hostname'] }}.local
          - --server-host {{ server_host }}
          - --user
          - pi
          - --ssh-key
          - ~/.ssh/pi_cluster
          - --k3s-version=v1.28.2+k3s1
      delegate_to: localhost

Breaking it down, this playbook repeats my custom installation, but wraps it around with ansible. It’s not ideal but did give me enough exposure to ansible (again) to move on to my goal: using the k3s-ansible playbook.

Adding k3s-ansible to the project

After nuking the cluster once again…I was able to clone the project, change my inventory to match the new format, and got the cluster up and running again pretty easily! I then tried moving the playbook into my homelab folder, ran it…and it broke!

I had copied the playbooks, but not the roles, and I had to get the directory structure in proper order. I also knew that by copying files from the project, I’d lose any updates made to the public repo. I wanted to pull updates down, so I instead imported the repo as a submodule and then symlinked the folders I needed to the right spot.

I wanted to hide the submodule(s) (anticipating more for this pattern) and be able to symlink the parts I need from a hidden folder. Thus, I created the folder .submodules and added the submodule to that folder.

mkdir .submodules
git submodule add https://github.com/k3s-io/k3s-ansible.git .submodules/k3s-ansible
git submodule init
mkdir playbooks

For the playbooks, I wanted a place where I could pull in the submodule playbooks but also store and create my own. I anticipate needing to add a few things to the cluster immediately after it’s built (LoadBalancerClass, CSI, etc.) and I want a singular playbook folder at the root of the project.

mkdir playbooks
ln -s .submodules/k3s-ansible/playbooks playbooks/k3s-cluster

I need the roles to make the playbooks work, but wanted to carry them over individually in case I add roles of my own.

mkdir roles
for role in $(ls .submodules/k3s-ansible/roles/)
do
    ln -s .submodules/k3s-ansible/roles/$role roles/$role
done

I had to redirect the role and inventory lookup to the root of the project. I also enabled caching for my inventory–for what I do, it doesn’t hurt.

[defaults]
roles_path = ./roles
inventory  = ./inventory.yaml
fact_caching = jsonfile
fact_caching_connection = ~/.ansible/cache

A repeatable working cluster

With all this done, I can run ansible-playbook playbooks/k3s-cluster/site.yaml and off we go!

PLAY [Cluster prep] ***************************************************************************************

TASK [Gathering Facts] ************************************************************************************
ok: [kalimdor]
ok: [northrend]
ok: [eastking]
ok: [brokenisles]
ok: [azeroth]
ok: [pandaria]

...

PLAY RECAP ************************************************************************************************
azeroth            : ok=31   changed=6    unreachable=0    failed=0    skipped=46   rescued=0    ignored=0
brokenisles        : ok=20   changed=3    unreachable=0    failed=0    skipped=38   rescued=0    ignored=0
eastking           : ok=20   changed=3    unreachable=0    failed=0    skipped=38   rescued=0    ignored=0
kalimdor           : ok=20   changed=3    unreachable=0    failed=0    skipped=38   rescued=0    ignored=0
northrend          : ok=20   changed=3    unreachable=0    failed=0    skipped=38   rescued=0    ignored=0
pandaria           : ok=20   changed=3    unreachable=0    failed=0    skipped=38   rescued=0    ignored=0

There’s still work to do. I need to add all the components and operators that I plan to use, and to also put my services back in a reusable (and backed up) format. Stay tuned!2

  1. I used k3sup to build this cluster before (and during). I still think it’s a great project and makes it easy for someone playing around to get started. My needs have changed, and thus k3sup isn’t optimal for me right now. ↩︎
  2. …assuming I actually write those blog posts! Encouragement helps! ↩︎

Building a smart device without writing code

A while ago (2019 according to the repo), I was learning about the Internet of Things (IoT) and went through the process to prototype a smart indicator light. I made it communicate with AWS IoT where I could both change the color of the light on the device (and it would report to the cloud) as well as change the color in the cloud (and have the indicator light change).

Separately, I’ve also been spending more time on home automation. I have Home Assistant setup in my house and had been reading on ESPHome but haven’t come up with a good test project–so I decided to repurpose my indicator light to work with ESPHome!

Original Hardware

I wanted to see whether I could use the original hardware without modifications–mostly because instead of recreating the board, I just dusted it off…

Original prototype on breadboard

As the name may imply, ESPHome must be used by hardware supporting the ESP32 or ESP8266 (or RP2040, but that’s for another time) chipset. I originally made this prototype on a Raspberry Pi but wanted to use a smaller form factor for portability and yet retain the ability to connect using Wi-Fi. I’ve been using the Adafruit Feather HUZZAH on a few projects, and had back then, so I stuck with it.

Removing the Software

This project has been through a few iterations of software. I first started with python on the Raspberry Pi [code]. This would use the GPIO to control each leg of the RGB LED and would communicate with an IoT shadow in the cloud for the status. This meant AWS IoT was my interfacing layer and I could build a web-based GUI, Alexa skill, or mobile app to control this light.

When I switched to the Feather, it meant I needed to change programming languages. While MicroPython was an option, it still required the interpreter at runtime and didn’t have the benefit of compiled code. I also wrote the program in C (using Arduino) but never bothered to become proficient with C’s syntax, and ended up using JavaScript (using Mongoose OS). The trouble with all of these approaches is that the intent is simple (power to pin when condition) but writing the code becomes more difficult.

ESPHome has a different approach–you declare which components to use and provide the configuration for those components, then ESPHome compiles the modules and configuration together and produces an artifact that can be loaded onto the device. Anyone familiar with kubernetes will recognize this pattern: declare your intent in a resource file and let kubernetes build it. With ESPHome, I declare the light and which pins to use for output, and it builds the rest of it for me.

This is the configuration section for the LED in ESPHome:

light:
  - platform: rgb
    id: torch_led
    name: "torch_light"
    red: led_red
    green: led_green
    blue: led_blue

output:
  - id: led_red
    platform: esp8266_pwm
    pin: GPIO14
    inverted: true
  - id: led_green
    platform: esp8266_pwm
    pin: GPIO12
    inverted: true
  - id: led_blue
    platform: esp8266_pwm
    pin: GPIO13
    inverted: true

While this appears simple enough, I still did have to spend time learning the different values, but was able to piece it together by looking at the examples on ESPHome’s website.

There’s an added benefit of “no code” solutions like ESPHome like the included features regarding Wi-Fi, Over The Air updates (OTA) and API integration. For every programming language, adding these features meant extra lines of code and setup, but ESPHome packages them as part of the configuration and build process. Much of the code in the earlier revisions was dedicated to Wi-Fi and API connectivity, with only a small section actually controlling the physical hardware. I added OTA when moving to ESPHome, and wrote less lines as a result of the switch!

Migrating from AWS IoT to Home Assistant

While I was able to build interfaces that worked with IoT and the cloud, I wanted something that was already interconnected and didn’t require me to build the integrations. I also prefer for control traffic to be kept as local as possible. While the cloud rarely goes offline, my internet connection is much more susceptible to outages which would render the light inoperable. With a local brain, I can save on both.

Like this project, I’ve built Home Assistant a few times over the years and have been slowly expanding it to incorporate the features I need. I have the Home Assistant Podcast on my feed and it seems like everyone kept mentioning ESPHome and how it integrates with Home Assistant. Plus, ESPHome is easily run as an addon for Home Assistant. However, the best part is the interfacing is done for me! When I create the light in ESPHome, the device and entity show up in Home Assistant and include the interfacing.

The color and brightness controls come automatically in Home Assistant since I selected a RGB light as the platform in ESPHome.

Because I’ve integrated Home Assistant with Alexa, I also automatically get an Alexa interface through the Alexa app as well as voice control!

Alexa app also automatically can control the light.

Okay, now what?

What’s the point of a RGB light that’s “smart-controlled”? The device isn’t practical–but it’s one of the first small board projects I built and have spent a lot of time with. I’d already completed this project, but was able to repurpose it and find out something new. So the point–is discovery.

That’s because great achievement has no road map. The X-Ray is pretty good, and so is penicillin, and neither were discovered with a practical objective in mind. I mean, when the electron was discovered in 1897, it was useless. And now we have an entire world run by electronics. Haydn and Mozart never studied the classics. They couldn’t. They invented them.

Dr. Dalton Milgate, exerpt from the fictional series The West Wing S3E16

The project itself is a learning tool–now that I’ve made this work, I’ve also been able to add smart controls to a LEGO set with lights. Now as I’m automating my house, if I need a random motion sensor that communicates with MQTT then I can build it and integrate it quickly!

ESPHome also makes home automation more available to everyone. I speak more programming languages than languages–but not everyone does. Writing a config file is much easier than writing code and it cuts down on development time. Less time on software means that I also get more time on hardware!

Image from Yarn

Cheap and quick Mastodon alias

EDIT: The format is JRD+JSON per RFC 7033. Changed the reference below, and thanks to mdaniel on HN.

With the uncertainty of Twitter looming over us, I did what everyone else in the community did and looked to alternatives, including Mastodon. The appeal of Mastodon is the distributed nature, but that’s also a pitfall to muggles (non-technicals).

I want to use a simple alias for being able to find my Mastodon name, and went and purchased salvo.chat. I have a number of Twitter aliases (because of course I do!) so I wanted something incredibly simple. Unfortunately, most of the Mastodon hosting providers are completely overwhelmed right now as we all figure out how to do with the influx of demand.

I did consider setting up a Mastodon server, but I definitely started to over-engineer it (was gonna host it in Kubernetes on my homelab) so instead I changed gears and said “what can I do fast that’s a temporary alias?”

There’s been a few technologies that I’ve been looking for a use case. I need something now that’s cost-predictable, simple, and easy to setup–and put these together real quick:

  • DigitalOcean droplet (1 vCPU, 512 MB RAM, 10 GB SSD, $4/mo)
  • Caddy server

The droplet was simple enough, and I get a credit for two months (somehow I’ve never used DO before) which gives me time to customize and find a long-term solution. However, the exciting part is using Caddy. It’s written in Go and includes some nice features including automatic HTTPS. This means with almost NO configuration I can have a secure website that will alias to my mastodon alias.

I wasn’t really sure what to do to get it working though, but fortunately I came across Mastodon on your own domain without hosting a server by Maarten Balliauw which walked me through the technical details. I took his discovery and used it to setup my alias server.

Steps to recreate

First I had to get my webfinger details from the current provider–a simple cURL helps here.

$ curl https://mastodon.cloud/.well-known/webfinger?resource=acct:buzzsurfr@mastodon.cloud
{
    "subject": "acct:buzzsurfr@mastodon.cloud",
    "aliases": [
        "https://mastodon.cloud/@buzzsurfr",
        "https://mastodon.cloud/users/buzzsurfr"
    ],
    "links": [
        {
            "rel": "http://webfinger.net/rel/profile-page",
            "type": "text/html",
            "href": "https://mastodon.cloud/@buzzsurfr"
        },
        {
            "rel": "self",
            "type": "application/activity+json",
            "href": "https://mastodon.cloud/users/buzzsurfr"
        },
        {
            "rel": "http://ostatus.org/schema/1.0/subscribe",
            "template": "https://mastodon.cloud/authorize_interaction?uri={uri}"
        }
    ]
}

I also pre-built a droplet and set my DNS for the domain to point to the droplet.

I then saved this to a file in the droplet, and moved to installing Caddy. I went the package route so I could make quick updates if necessary, then had to find the Caddyfile (which was in /etc/caddy). The Caddyfile has enough to launch a web server locally. The only changes I had to make was to change the listener to the domain (which enables automatic HTTPS) and added the header so that the webfinger response would be JRD+JSON. I’m not sure it was necessary, but when you work on load balancers as I have, you want to make sure.

# The Caddyfile is an easy way to configure your Caddy web server.
#
# Unless the file starts with a global options block, the first
# uncommented line is always the address of your site.
#
# To use your own domain name (with automatic HTTPS), first make
# sure your domain's A/AAAA DNS records are properly pointed to
# this machine's public IP, then replace ":80" below with your
# domain name.

salvo.chat {
	# Set this path to your site's directory.
	root * /usr/share/caddy

	# Enable the static file server.
	file_server

	# Another common task is to set up a reverse proxy:
	# reverse_proxy localhost:8080

	# Or serve a PHP site through php-fpm:
	# php_fastcgi localhost:9000

	route {
		header /.well-known/* Content-type application/jrd+json
	}
}

# Refer to the Caddy docs for more information:
# https://caddyserver.com/docs/caddyfile

A quick restart, and my server was running. I tried cURL on the new URL:

$ curl https://salvo.chat/.well-known/webfinger?resource=acct:buzzsurfr@mastodon.cloud
{
    "subject": "acct:buzzsurfr@mastodon.cloud",
    "aliases": [
        "https://mastodon.cloud/@buzzsurfr",
        "https://mastodon.cloud/users/buzzsurfr"
    ],
    "links": [
        {
            "rel": "http://webfinger.net/rel/profile-page",
            "type": "text/html",
            "href": "https://mastodon.cloud/@buzzsurfr"
        },
        {
            "rel": "self",
            "type": "application/activity+json",
            "href": "https://mastodon.cloud/users/buzzsurfr"
        },
        {
            "rel": "http://ostatus.org/schema/1.0/subscribe",
            "template": "https://mastodon.cloud/authorize_interaction?uri={uri}"
        }
    ]
}

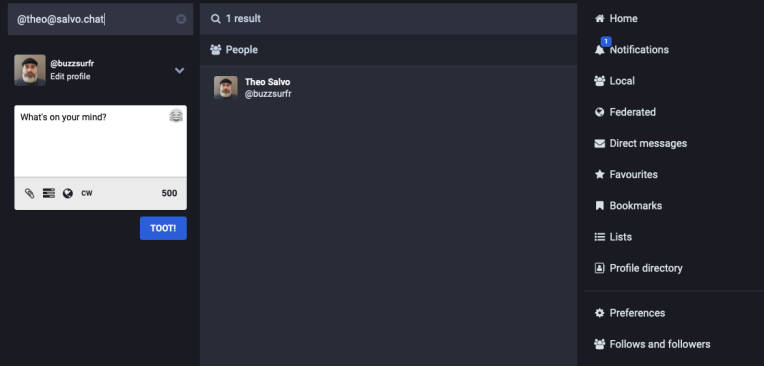
And that’s it! Now if you go to your Mastodon client and search for @theo@salvo.chat my @buzzsurfr@mastodon.cloud comes up!

Building PI-BERNETES: a home lab

I bought my first Raspberry Pi (B+) in 2014 when they first launched. I remember buying it because I was spending my time coding but wanted to do so on personal hardware that was accessible and replaceable, and the B+ was $35 USD at the time. I still have it, and it still works (though not in use today).

At the time of writing, I have 23 different single board computers (SBC) but was mostly intrigued by the Raspberry Pi 4 because of the arm64 architecture and 4 GB available RAM. So I set out to build what was completely unnecessary and yet fun–a Kubernetes cluster out of Raspberry Pies!

Design Phase

I turned to the one “true” source for inspiration: the internet. #100DaysOfHomeLab

I really like this case and how clean it looks!
A really neat project with some additional ideas on interfacing between the cluster and the environment.

I found a few ideas and started to figure out what my design considerations were.

  • Cable management and airflow is important. Since I’m an ex-Network Engineer (though those skills have yet to leave me), I wanted to make sure I could keep them running cool without a lot of noise, and that means spending a little extra on power over ethernet (PoE).
  • Modular and expandable. I’ve seen the TuringPi boards, but this doesn’t fit my need as I want to be able to remove or add boards without affecting the surrounding components.
  • Mix of compute and storage. I knew I had some workloads that would need more than I wanted to (reasonably) fit on a SD card, so I wanted the cluster to support both compute units and storage units. In this case, that’s just mounting the hard drives as bays and attaching them to a raspberry pi.
  • Self-sustaining. I plan to use this cluster for operating my home automation and running private services for projects and community contributions outside of work, so I don’t want to depend on any outward services that I can’t swap out.

Hardware

Software

Selecting a container scheduler. Given my experience with containers, I knew that I wanted to run containers across these devices. With the rise of arm64 architectures being massively commercialized through AWS Graviton, Apple silicon, Azure VM, and GCP Tau series compute, I wanted to build an arm64-based distro that was capable of running containers. Since I wanted to keep the cluster self-sustained, I ruled out the typical AWS services like ECS Anywhere and EKS Anywhere because they have to communicate with the cloud on some level (plus EKS Anywhere doesn’t have arm64 support yet!). Given how much work I do with kubernetes, I wanted to select a k8s distro and ultimately selected K3s (pronounced “kates”) because it’s backed by SUSE (Rancher), is lightweight (helps save resources for running containers) and has packaging included.

Packaging with addons. Since kubernetes doesn’t provide a lot of services on its own (by design), there are a few things to include into this cluster build that will help offer the same services and kubernetes resources like you would get from a cloud-based distribution. K3s includes, helm, serviceLB, and traefik–but it was hard to customize the last two so I disabled them and installed traefik on my own plus MetalLB for load balancing. Since some of the nodes have extra storage, I wanted a storage controller that could integrate with scheduling pods that need hot storage to schedule onto the nodes with the SSDs, and selected longhorn.

Customizing these addons wasn’t difficult, but like with many open source solutions, different version documentation can be a real problem. For example, MetalLB recently switched from a ConfigMap to CRDs for defining resources, so it took extra digging to get it running but I did with these resources:

Traefik required customizations, mainly to the helm chart to automatically use the MetalLB load balancer and VIP and to enable ingressClass resources. I also added cert-manager to support encrypted endpoints using LetsEncrypt.

Instead of trying to list every customization, I also spent some time making this process repeatable. I originally bought all this hardware in 2020 and built a cluster but ran into problems early and made too many changes to record. This time, when I started, I made sure I documented the process. My manifests and notes all will end up in a Github repo (with the secrets removed) for anyone else to learn from my experiences.

What’s the point?

So far, other professionals would tell you that I have a working kubernetes cluster that does absolutely NOTHING. Why connect all of these nodes together? What can you do with it?

Since I’ve been an operator for most of my career, I tend to get everything ready for use before building a single thing. But I do have ideas of what to run on this cluster and how it’s used.

  • Home automation. I currently have Home Assistant running on its own Raspberry Pi (as one of the blades in the picture), but I’d like to move this to containers and work with that community on repeatable processes.
  • Git server. Sometimes, there are code projects you don’t want out on the public internet. I plan to run Gitea on this cluster and back it on the SSDs.
  • Home cloud. If you develop on AWS and haven’t seen LocalStack, I highly recommend checking it out. The idea started behind lambda-local and dynamodb-local but quickly expanded and added arm64 support.
  • Minecraft server. Because I have kids, and one of them is learning to program.
  • Media server. I have a bunch of DVDs and Blurays that never get used because I’m too lazy to put the DVD in the tray, so I’m gonna digitize them and host on Plex or something similar.
  • Code server. It’s been a dream of mine to work from a tablet, and coding always tends to be one of those misses. At least with code-server, I can make it easy to use an IDE (as long as there’s reliable internet).
  • Donate unused compute. There’s services like Folding@home and BOINC that allow scientific & academic communities to run their code on remote machines, and I can donate my “unused” CPU cycles to one of these programs. I’ll of course prioritize my own workloads, but if I’m not using those cycles then they might as well go to a good cause.

  • Random sparks or ideas. Because I had set most of this up before KubeCon North America 2022, I had a running cluster ready for running coding challenges and testing out new projects and ideas and was able to complete most of the challenges on the showroom floor, during sessions, or while at the hotel.

Ultimately, having this cluster gives me the freedom to run side projects and test various ideas from my house. It’s not production-ready, but rather experimentation-ready!

Days 15 & 16 – Heading Home

Today’s the last day (kind of—I’ll get to that) of the trip, and we felt both accomplished (from doing mostly everything we wanted to do) and burned out (from doing mostly everything we wanted to do), so we were keeping it easy today and gonna head to the airport in the afternoon.

We stopped by our coffee shop and made sure to tell them to stop making extra sandwiches on our account because it was our last day here! We (by “we”, I mean “me”) broke one of their plastic Adirondack chairs yesterday, but not wanting to put any kind of burden on a deserving small business, we (by “we”, I mean “Megan”) bought two new chairs and set them to be delivered a few hours later!

We wanted to get an early lunch (so we didn’t have to have airport food ALL DAY), and there was only one place we hadn’t been that had been on our radar: Bear Tooth Theatrepub. This half-restaurant/half-theater is a not-so-distant cousin of Moose’s Tooth and Broken Tooth Brewing—and it was close by—so we got there just as they opened (luggage in tow) and got a booth. While we didn’t see a movie (showtimes were in the evening) we did check out the connected theater and had a good lunch, then made our way to the airport.

And that’s when the fiasco started. We arrived at the airport around 1:00 PM and Megan was off to catch her 4:00 PM flight while I went to check my bag at the American Airlines counter for my night flight which left at 9:40 PM. It took some time to find the counter and even more time to find out that it’s only open from 6:30-8:30 AM and 7:00-9:00 PM because they only operate two flights out of Anchorage!!! I thought about using the “bag check” service at the airport (where they hold your bags while you explore the town) but I was already tired that I just waited…

…and waited…

…and waited…

…and the counter crew came out around 7:15 PM, but the self-check machines were also down, so those then had to be fixed. I ended up pretty far down in the luggage check line, but knew that everyone there was on the same flight and they’d make sure everyone made it. Plus, I basically skipped to the front of the line when it came to TSA security checkpoint because of my status. It was at least a 30-45 minute line but I was next because of PreCheck, so I waltzed right in and headed toward the gate.

I had my first dirty martini 🍸 on this trip, so I decided to make my last alcoholic drink also a dirty martini at a bar near the gate. Plus, since I have a night flight, I wanted to be extra relaxed for the flight.

But alcohol also inhibits my ability to do time zone math, which is particularly interesting. I’m starting in Anchorage which is AKDT (-07:00), connecting in Dallas which is CDT (-05:00) and my final destination is Tallahassee which is EDT (-04:00). There’s a 4 hour difference between Alaska and Florida. This means that my 9:40 PM AKDT flight is already 12:40 AM CDT and 1:40 AM EDT, but really there’s no telling where my day 15 ended and my day 16 began.

The first flight was 6 hours long. I had my portable CPAP and used it but felt like I got 6 one-hour naps instead of 6 hours of sleep. I arrived to Dallas at 7:00 AM CDT/8:00 AM EDT/4:00 AM AKDT and had 5 hours before boarding my second flight. I basically wandered DFW like a zombie 🧟‍♂️ but didn’t want to sleep because if I fell asleep then I’d likely miss my connecting flight (I was THAT tired). I boarded at 12:00 PM CDT/1:00 PM EDT/9:00 AM AKDT and basically slept soundly (without the CPAP—sorry flight mates) until we arrived in Tallahassee at 3:30 PM EDT/2:30 PM CDT/11:30 AM AKDT.

Even though I had made it home, I wasn’t quite done. I took the taxi 🚕 to the house, only to get in my car and pickup the dogs 🐶🐾 from boarding. Now, when they come home from boarding, they’re excited for 2.3 seconds then they basically sleep for the next 3 days. I’m gonna try, but it feels like the middle of the afternoon to my body. The only advantage is I finally have seen the night! 🌃🌚 Good night!

Day 14 – Fishing (or not)/Museum/Another Rest Day

Before the trip began, one of the things I wanted to do as a “bucket list” item was to go fishing in Alaska. I had scoped out a place near downtown called The Bait Shack that would rent the rod, reel, waders, net, lures, etc. and were right on the creek. They even provided the fishing license and would send you on your way.

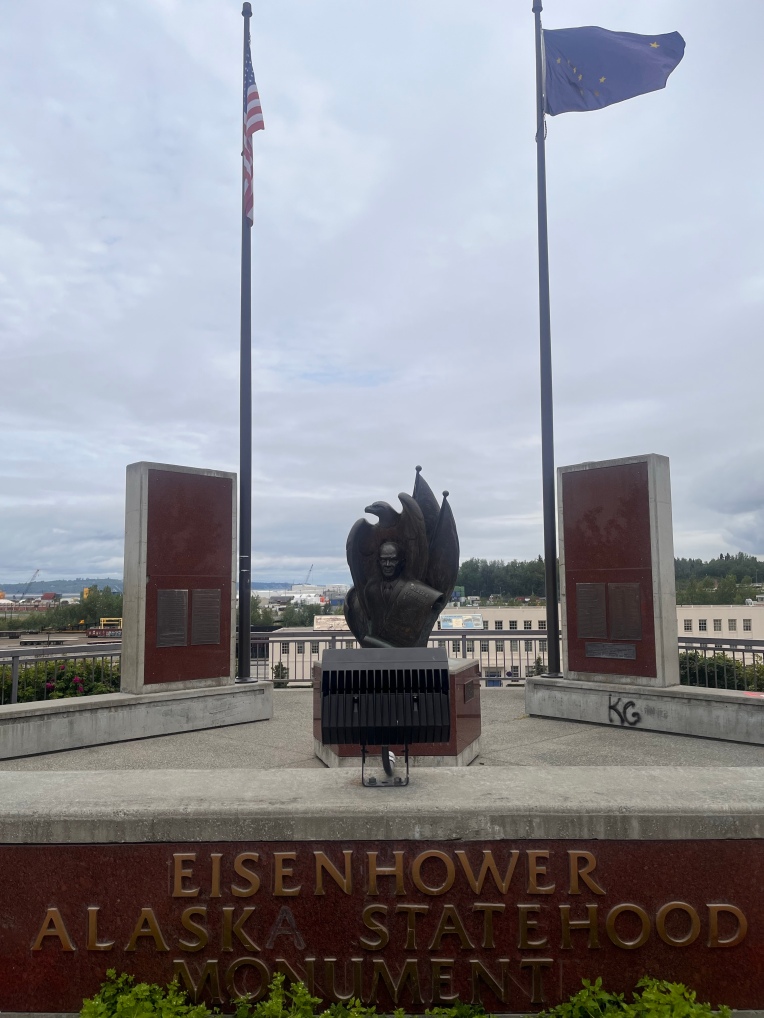
I woke up, got our usual breakfast from our coffee spot, took the bus 🚌 downtown, and walked toward the area. One big thing I’ve noticed is the vibrancy of color in all of the flowers here. The fireweed may still be my favorite, but the park had all sorts of colors, and across downtown there were the combination purple/yellow flower bushes hanging from the street lights. I also passed the Eisenhower monument, and some black roses.

Past the monument was the same railroad depot we had taken yesterday, but behind it was another building, the Alaska Railroad Corporation—the headquarters was right behind the depot! That’s twice we saw the same name and company in two separate buildings. I’m just glad we made our train yesterday.

Alaska Railroad Corporation building to the left, but notice that you can’t walk straight across. This is on purpose so you have to look up (presumably from your phone) and see whether a train is coming!

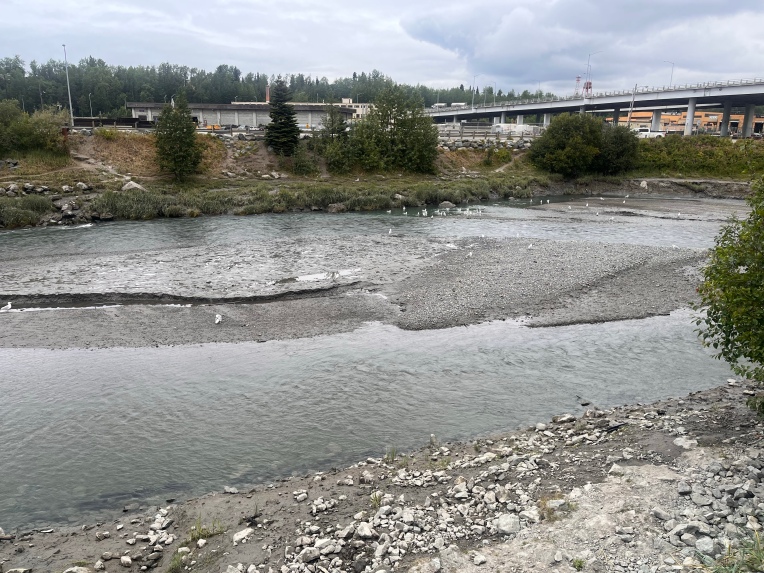
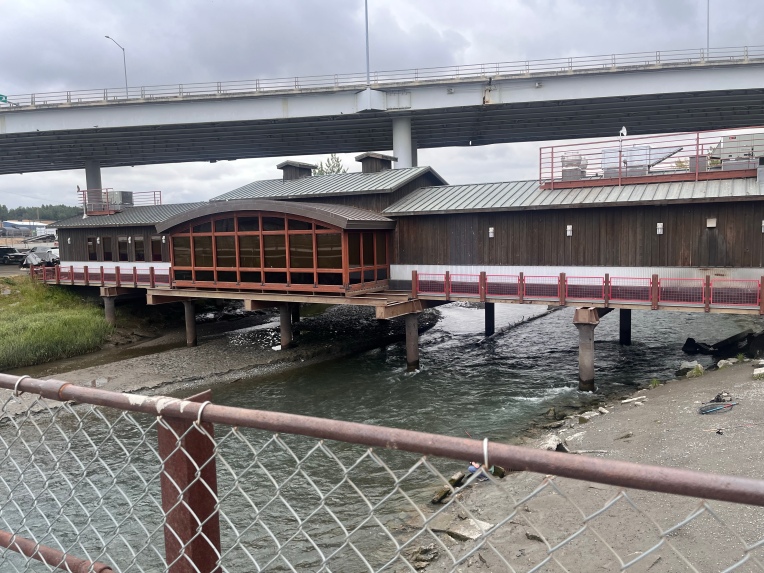
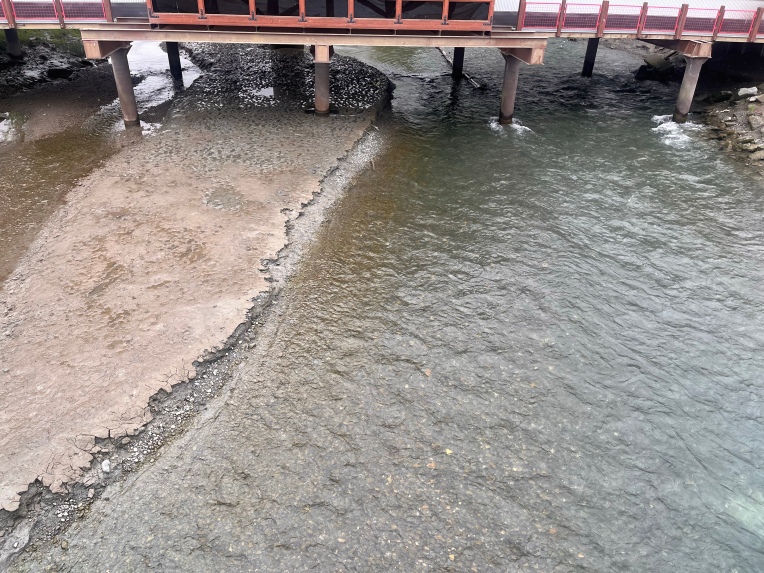
Right before you get to the shack, there’s a bridge where you can see the fish right from the water, and right next to it is a restaurant called “The Bridge” which actually is a bridge!

You may have noticed A) the tide is really low and B) there are NO FISH! 🐟 We learned yesterday that the tides can change 30-40 feet, and this was the low tide part. I still went on to the shack and spoke to the team. To their credit, they were honest with me that tide wouldn’t be later (too late for me) and that I was about a month too early for the good fishing! DRAT! But I guess that means I’ll have to come back… 😉

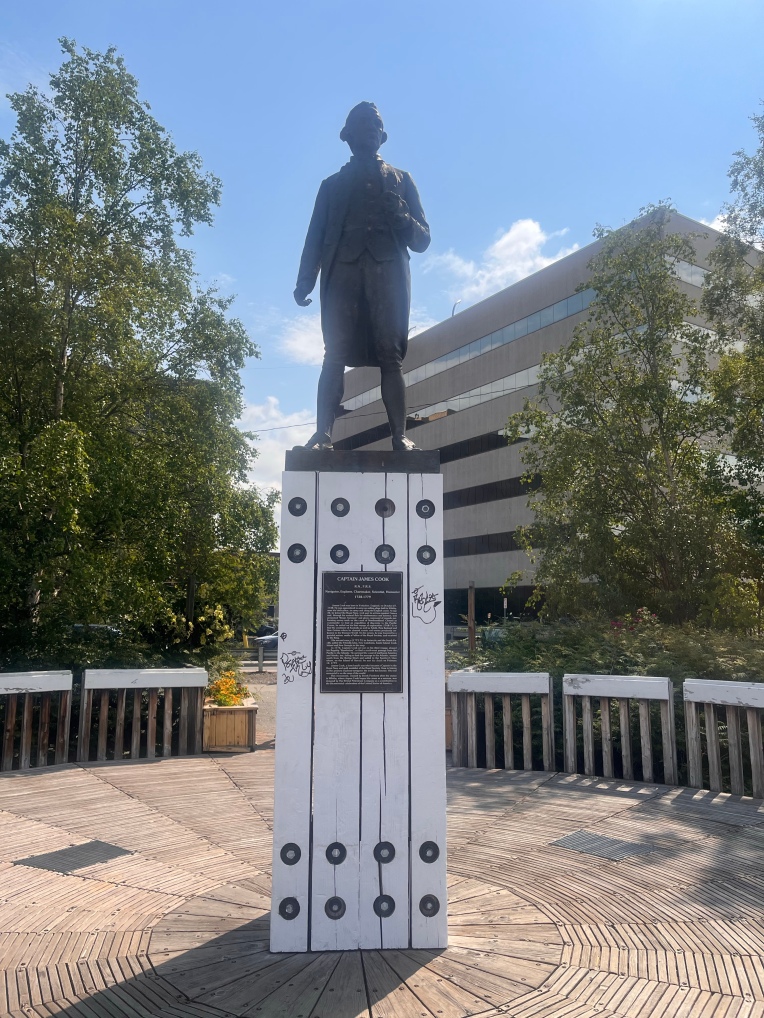
With “plan A” gone, I needed a new “plan B”. Megan had planned on going to the botanical gardens, but it was an overcast day which meant her pictures wouldn’t have the right lighting (at least as much as I understood what she said), so her “plan A” was gone so we met up in downtown and set our destination to a restaurant we had heard from all the Uber drivers that was a must-eat: Simon & Seafort’s. It was a decent walk away, and the food was okay—but it reminded me of more of a “business lunch” venue (for those in Tallahassee—think The Governor’s Club) and it just wasn’t our scene. Once we finished, we then went to see the Captain Cook monument, then did some more shopping downtown, including a yarn boutique and a few places with real Alaskan craft.

Captain Cook

Heading back toward the bus stop, we decided to add one more cultural stop on our tour at the Anchorage Museum. It had an eclectic collection of art, culture, education, and history that I crave in museums. My favorite exhibition was the Living Our Cultures, Sharing Our Heritage exhibit that had artifacts from all the major/minor Inuit tribes in Alaska and Siberia. You could see clothing, tools, etc. from each tribe and note the differences based upon environment, geography, etc. (No pictures)

After the museum, we took the bus back to the Airbnb and came up with two solid ideas for that evening. Idea #1 is to go to Arctic Sushi (which we had passed in downtown Anchorage) and walk around downtown some more. Idea #2 was to order Arctic Sushi delivery and eat it while watching TV. After two weeks of moving around—we opted for staying in. And for those keeping score, I actually LIKED the sushi 🍱 today—I might not wait another 10 years to have it again!

Tomorrow’s our last day, so we also spent the evening (because there is no night anymore) packing up, and I even shipped some of my stuff back home so I wouldn’t have to deal with it through airports.

Day 13 – Train to Whittier and Glacier Tour

When we left the cruise ship, we were definitely underwhelmed by the glacier…but then in Seward we found a flyer to see 26 glaciers in a day (on a 5-hour cruise). Long story short…today’s that day!

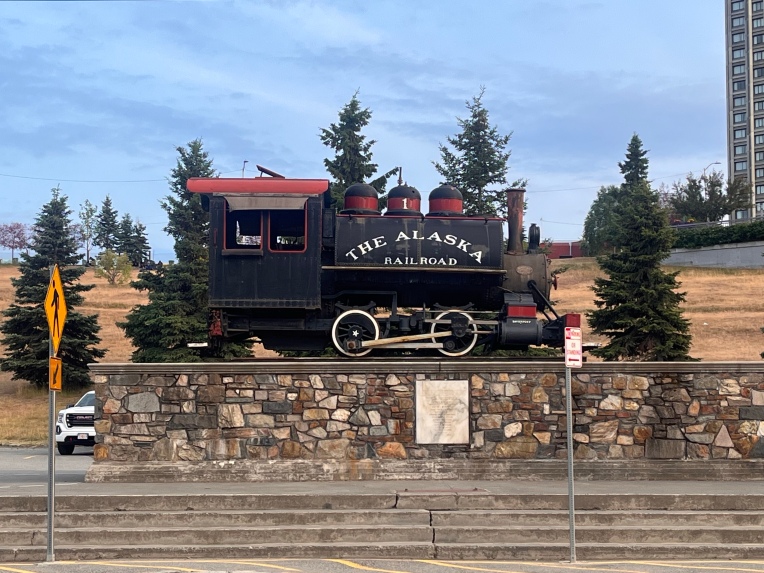
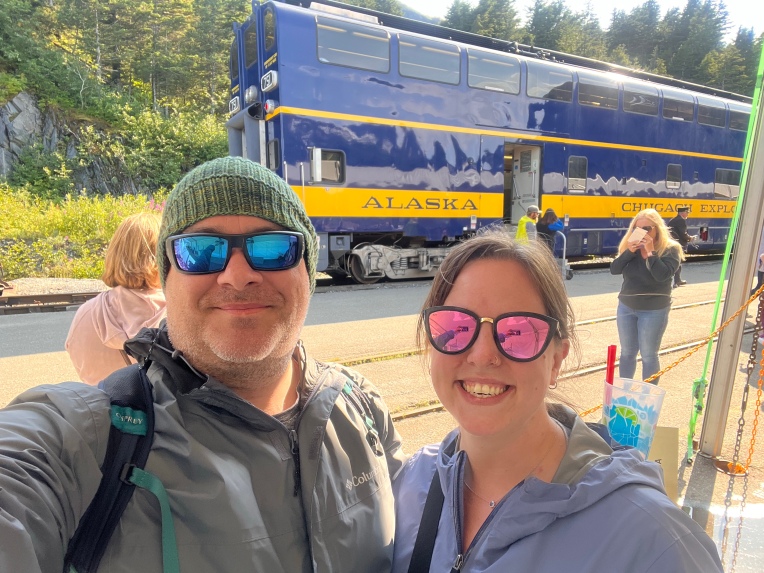
So far on this trip, I’ve taken a car 🚗, a plane ✈️, a bus 🚌, and a ship 🛳, but no train 🚂! We also got that as part of the glacier cruise deal, so we were super excited this morning as we headed for the Alaska Railroad Depot in Anchorage…after stopping at our coffee shop!

Megan and I are both infatuated with trains. My love comes from not having access to trains growing up—I was an adult before riding on my first train and I enjoy the ability to walk around and “stretch out” without bumping 12 people in a 4-person row on an airplane. This particular train runs from Anchorage to Whittier (another cruise terminal) for 2.5 hours. We checked in, boarded, and left!

If you can’t tell, we’re train enthusiasts.

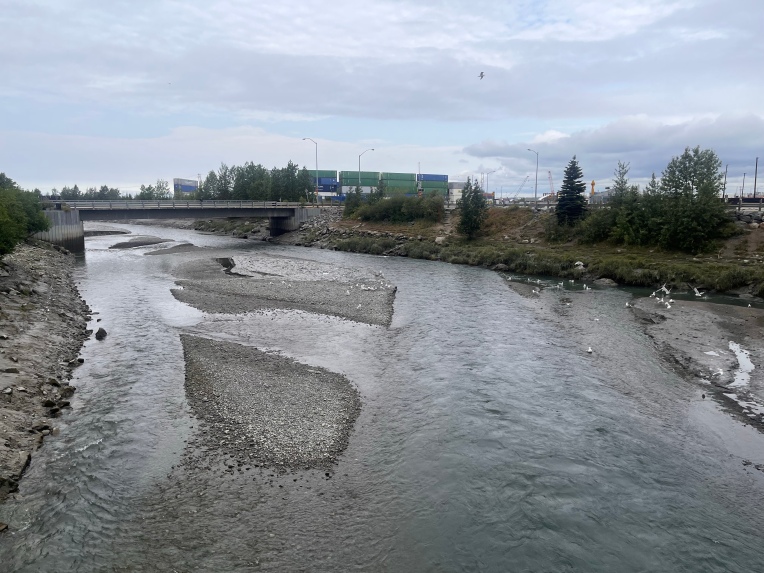
We enjoyed a few sights along the way, including the “mud flats”. In Anchorage the tide changes 40 feet 😳 so during low tide you can see land much further out. They did advise us not to walk on it ever because it’s like quicksand. And then, when the tide is in, it’s back to “River” status. We should see this on the ride home.

We pulled up to the Whittier “train station” (literally half of a tent) and crossed the street to the cruise terminal to pickup our tickets and board our vessel 🚢 for the day!

Because we were a last minute booking, we didn’t get a prime location for seating. It wouldn’t have mattered—the people with the good seats booked months in advance, and everyone was free to walk around. The seating advantage was really only about meal delivery. The cruise included a meal of either seafood chowder or vegetable chili (I couldn’t have the chowder because of the dairy 😭). They also had a bar and were serving “glacier ice margaritas” (basically a margarita with blue curaçao added) so we got some…but they were made using regular ice. It was a little of a let down, but was also tasty so we went with it.

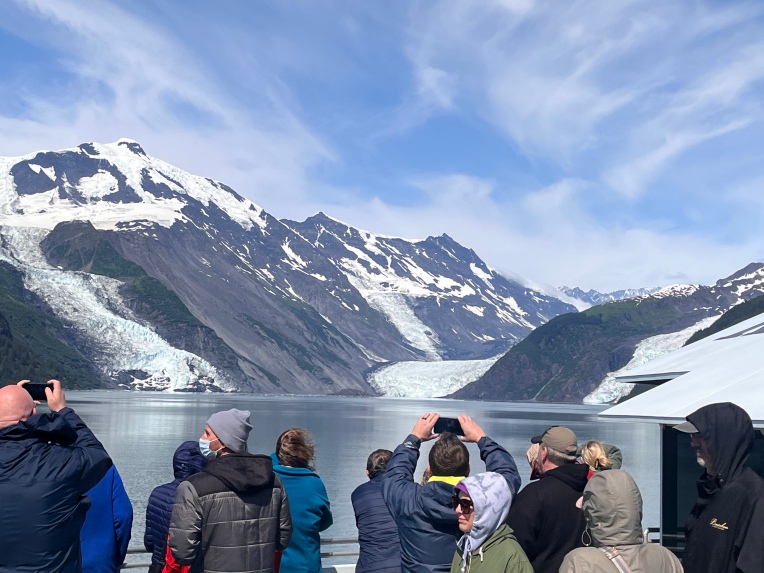
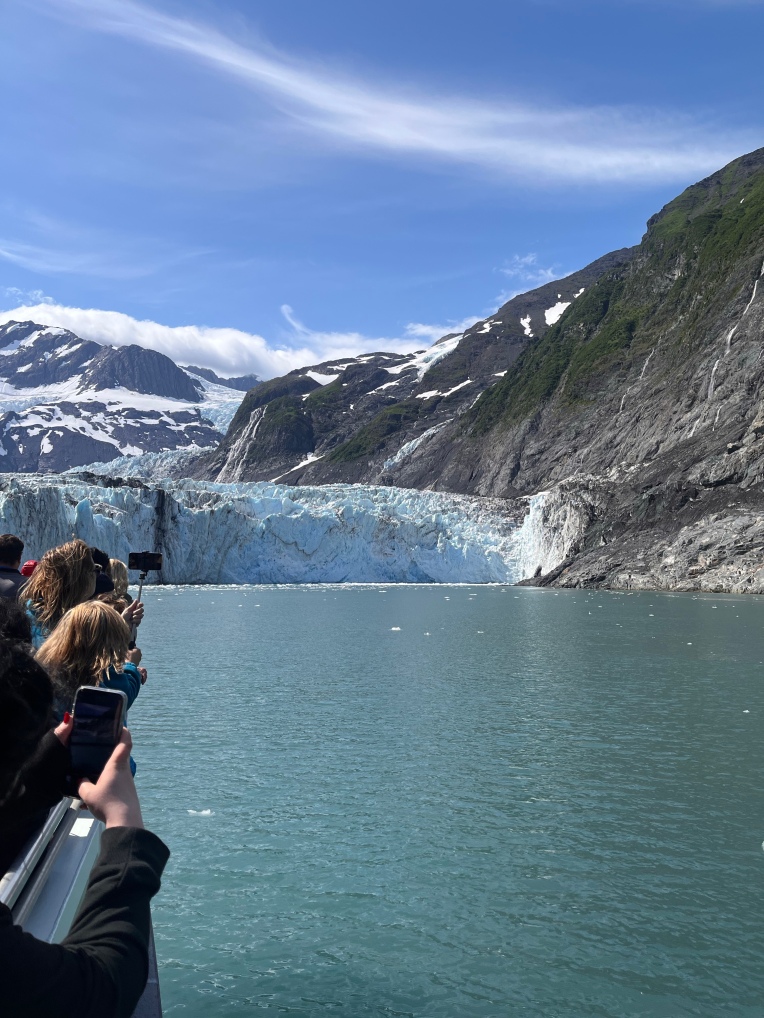
As we made the cruise they told us about the wildlife and different glaciers as we passed them. We also passed sea otters and a few other critters and finally ended up at “the big one”—Surprise Glacier. (I was not in charge of naming the glaciers.) This one glacier alone made the trip worth it!

We were stopped at Surprise Glacier for awhile, and to our enjoyment, they fished some ice out of the water (not chipping off the glacier but had already detached) and took that onboard to make glacier ice margaritas WITH GLACIER ICE!!!🧊 I’m not sure it tasted different, but it felt colder! 🥶

There was one other oddity on our way back. It’s either referred to the “wall of birds” or “wall of 💩” because it’s where all the gulls nest near a waterfall. It was intriguing, but I wasn’t getting up any more—I had my margarita(s)! (So I got a few pictures from my seat)

Once we made it back, we took the 45-second hike to the train station, where our train pulled up about 5 minutes later and we were off.

I’m not exaggerating—it’s 500 ft from the dock to the “depot” (half a tent)

Our train arrived back in Anchorage a few minutes early, and we had seen the 49th State Brewing Company on the train out, so we decided to sample the local food & brew, and it was close enough to walk…once we got the address right!

We did pass the brewery on the way, but it was their canning/bottling facility. The actual brewery was (of course) uphill from where we went. Then, because we came from the wrong direction—we couldn’t find the entrance. We ended up at the talent entrance (they have live music often) but there was an elevator with a hefty queue, so we walked around the building some more until we finally reached the entrance.

In addition to some rich stouts & porters, we also ordered dinner. I ordered a pizza (again, vegan cheese was available) and “cauliflower wings” with blue cheese dressing on them. And yes—it was VEGAN blue cheese dressing! I had Megan try it since I don’t like blue cheese to start with, and she confirmed that she wouldn’t know it was vegan! The wings themselves were super crunchy and spicy.I ate it all, and my sinuses definitely thanked me for it!

The worst part of the day was when we left the restaurant, it had closed already—so it was about 10:30 PM AKDT…but still looked like daytime! I think it’s starting to get to me—I haven’t seen nighttime in a few days…